Campaign
[toc]
The campaign is the story mode for BulletStorm. It contains 19 levels set throughout acts and chapters.
There are three things to look out for, if you want more achievements/trophies.
Electroflies
Newsbots
Nom Juice Bottles
Prologue – Chapter 1
On the road to hell.
The game starts off nice and slow. There are lots of on screen tips to help you through the prologue. After you get to the bridge you will jump on the guns. Fire at the guns mounted on the enemy ship. The guns will have a circle around them so you know where to aim. Once the guns are destroyed you will get a cutscene.
Flashback a few years to another mission. Pretty straightforward stuff again, follow your team and press the on screen buttons. After another scene you will exit the room into a lobby. Many enemies will flood into the lobby after you. If you’re playing a higher difficulty, you may want to stay behind cover while shooting some enemies in the head every now and then. After a few second, or maybe a few kills, the flashback will end.
You wake up in the present, your ship crash landed on some planet. Walk to your team to find Ishi on the floor. One of your men will pick him up. Escort them to the Medical Labs at the bottom of the ship. Your next objective is to get a power cell from a crashed capsule.
Make your way out of the ship. You will encounter freakish looking guys with axes breaking into your ship. If you want to get the “Pointless” achievement/trophy, start headshotting all enemies you can. You only need ten for it to unlock. Exit the ship and head towards the crashed capsule. Kill all enemies in front of you to get to the capsule. When you get close enough a cut scene will play.
After the cut scene, grab the leash. A new achievement/trophy will unlock called “Fits like a glove.” Use the leash when the game tells you to, it will definitely come in handy. Get back to the Med Lab to save Ishi. Kill all enemies in your path using the leash or the PMC. Try and get those 10 headshosts if you haven’t yet. Leave the Med Lab and walk to the window to activate the cutscene.
Act 1 – Chapter 1
Just like the old days.
A cut scene starts the level off and sets up the story. Move forward when you can to see explosive barrels, some things never change. Use the barrels to help you out against enemies throughout the mission. After the barrels, you will see a tin wall. Kick it down to get your guy moving. The game will tell you to kick another barrel to send it towards a group of enemies. If you’re playing at a higher difficulty, you can’t wait for the barrel to fall and explode. Shoot the barrel while it’s still in mid-air to kill all the enemies shooting at you.
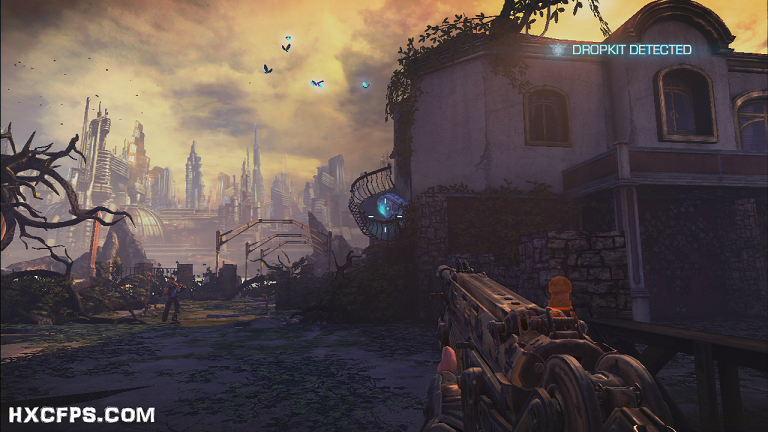
Move on until you reach a dropkit. It will be a strange looking object that tells you to leash it. Do what the screen tells you to do once you leash it. Exit out of the dropkit menu to find yourself ambushed. You need to earn 1200 Skillpoints. Earn Skillpoints by using skillshots. You will earn an extra bonus the first time you use a skillshot. Use your leash to pull them towards the gate, and shoot the explosive barrels for different skillshots. When you have enough points, the enemies will leave/die. Leash the dropkit again to view the PMC upgrades you can buy. The upgrade prices depend on the difficulty of the campaign. You should get the “Patched Up” Achievement/Trophy for getting a software update, unless I earned that for upgrading my PMC. You can also buy ammo clips from this drop kit. Perform 10 skillshots to earn the “wannabe” achievement/trophy. There are more achievements/trophies for all the other skillshots.
Move forward through the level to encounter more enemies. You can kick them up against the cacti for the pricked skillshot. A small base is a little further. Use your leash, PMC, and the explosive barrels to help you get through the gangs. Your partner may help you out if you need it or not. You can look for small cases that hold ammo. You will also get ammo if you walk over guns, but a lesser amount compared to the cases.
Walk up the catwalk in the base to move on. If you ever get lost, you can usually follow your partner to the right direction. The game will tell you about a feature it has. Click the aim button when it appears on screen to earn skillpoints. This and other similar features help speed up your reflexes for this fast paced game. The quicker you are to press and hold the button, the more Sp you earn.
Move on down the catwalk to face a few more freaks. Take them out with whatever skillshots you want. Kick down the gate and use the elevator down to end the level.
Act 1 – Chapter 2
Last train from explosion town
The level starts out with you and Ishi at the bottom of the mine. Walk forward to a gate that needs to be kicked, but before kicking it, you can upgrade your PMC with the dropkit. You now have access to the Charge Shot, if you have enough Sp that is.
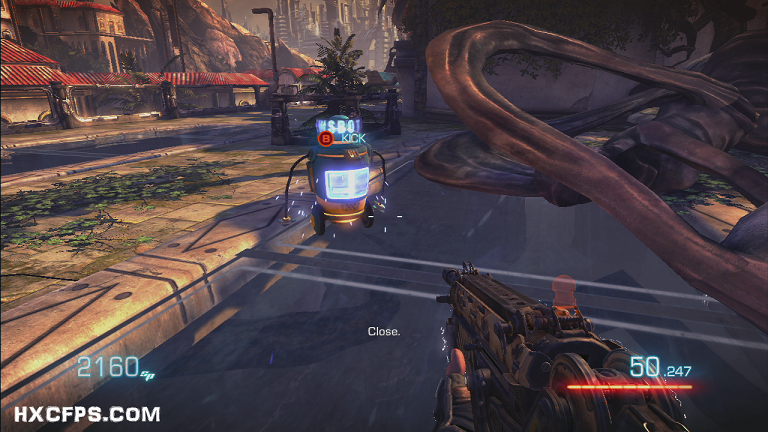
Kick down the gate and slide down the water tunnel. You will encounter one enemy at the bottom and one a few feet from the water slide. Keep going until you reach a room full of helicopter like vehicles on the roof. Destroy them all using your leash.
More enemies will come before you can destroy them all – probably. They will be on top of a cat walk at the right side of the room. Leash or shoot them and kill them all. If you get hurt, take cover behind one of the crates on the floor.
Once the gang is eliminated, a helicopter will fly in through the door. You can leash the driver out of the seat, but you will need to press the leash button inside of a small area on a meter. It’s sort of like a mini game to make leashing an enemy out of a helicopter a tougher task.
Exit the room to find another dropkit on the edge of a cliff. Upgrade anything you want. Personally I bought the charge shot for the PMC. Head to the right, down the ramp. You will find a few more enemies at the bottom. If possible, kick one of the cliff for the Vertigo skillshot. Another helicopter will fly by. Leash out the driver or destroy the vehicle, then take the elevator down.
At the bottom you will find more enemies. Kick them off the edge or kill them any other way you like. More enemies will be hiding in the building up ahead. Wait for them to stand behind the boards on the doors, then kick the boards in to kill them with the pancake skillshot. At the back of the house you should see another helicopter flying in the distance. Explosive Barrels will be right behind the helicopter. Blow up the barrels to earn another skillshot and kill tons of enemies in the back.
Move forward to find another drop kit. Up a ramp is an enemy on a mini gun. You can take him out quickly with a charge shot, or fire at his head with regular bullets. Grab the mini gun just in time for more helicopters, apparently called “Vultures.” Destroy them all with your mini gun, but know that it will over heat if you keep your finger on the trigger the whole time.
After they’re all destroyed you will drop the gun. Continue on to face more freaks. Remember to kill with skill for points. Keep moving forward eliminating everyone in front of you. The level is pretty linear with nothing special. When you reach the power room, you can kick enemies into the electrical things for a new skillshot. Move on until you reach a chaingunner miniboss. He can be tough to the less experienced player. Shoot him with charged shots or aim for the head the whole time. When he drops to a knee, shoot him in the head until he dies. You cannot leash nor kick him.
Jump on the train to grab another mini gun. Use it to kill off all enemies on the loading platform below. A cut scene will play after a few seconds.
The next part of the mission has you and your mini gun on the train. Destroy the cars behind you as you outrun the giant wheel. After the cars come trains and vultures. Stand on the end of the train platform to get a better shot. You won’t have much cover anyplace else anyways.
Eventually a bigger gyrocopter will come at you and fire torpedoes. Shoot the torpedoes in the ground before they destroy your train. The giant wheel will come at you even faster than before. Shoot the big red tanks to cause explosions that knock the wheel off center. I was killed instantly while on the back of the train platform at this time, I guess you can’t be at the end anymore. Kill any more vultures you see as the level comes to an end.
Act 1 – Chapter 3
Whatever it is, it’s pissed
The chapter starts off with one of those trigger games. Jump on the rope ahead and climb to the other side. Then slide down a rope to the ground. At the bottom is another dropkit. Upgrade or buy any ammo if you want. Walk up the mountain and back down. You will encounter a few enemies along the way. A new enemy will hold a new weapon, a screamer. The screamer is a pretty decent gun. After you kill the enemy, walk up to his dead body to pick it up. Next time you find a dropkit you can buy an access pass to upgrade it.
Vultures will fly by while fighting enemies again. One is damaged and sets down on a cliff. The other comes after you. Take out the vulture by leashing it or shooting it. Your objective is to steal the damaged Vulture on the cliff.
Enter the cave at the bottom of the path. It’s pretty linear inside. You should come up on a nest full of giant eggs. Kick them or shoot them to make it through the cave. About half way you’ll hear a growl. There will now be a time limit. Run through the eggs as fast as you can. Exit out the top to reach the Vulture and enter an interactive cutscene that ends the Act.
Act 2 – Chapter 1
Damsel in Distress
The chapter starts off with a small cut scene. Afterwords you will find a dropkit. Leash to it to see the screamer in the database. You will need to buy an access pass for 600Sp in order to upgrade it first.
Make your way up a rocky path. You will face a few enemies on your way to town. Try the new screamer skillshots out. When you reach town, you will find a swarm of electroflies over a pond and dropkit. On the other side of the pond are a few enemies. Take them all out and move on. Not far from the pond is a newsbot. Remember to kill all electroflies and newsbots to earn the achievement/trophy.
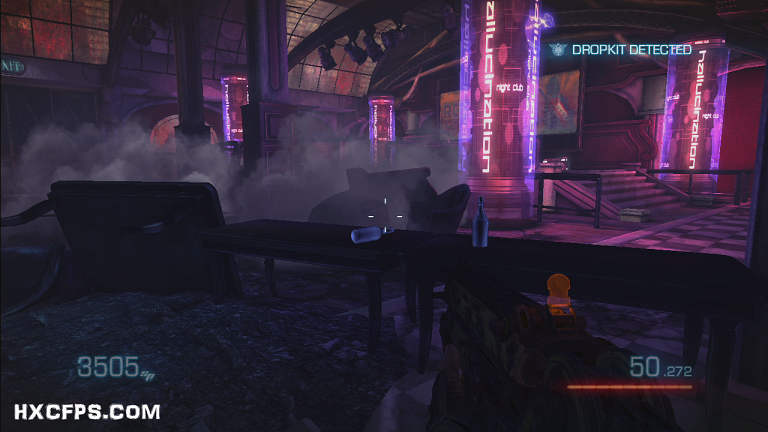
Walk ahead to the next area. There will be more enemies around a hot dog cart and some cacti. Blow up the cart and uses the cacti for more skillshots. At the end of the courtyard is a disco. To the right of the entrance, up in a scaffold, is another dropkit. You can upgrade or buy ammo if you like. Enter the disco and look directly to your right on a table. You will find two bottles. You can drink or destroy 20 of these to earn two achievements/trophies. There are tons scattered throughout the game, or you can restart the checkpoint to farm the achievement/trophy. The bottles will keep coming back.
After you’re done with the bottles, jump over the table and enter the dance floor. If you stay on the dance floor the entire time you kill the crowd, you will earn another achievement/trophy. There will be a miniboss on the dance floor – a chaingunner. Take him out anyway you like. There are a few skillpoints you can earn.
Walk outside of the disco to find more enemies on top of a building. Take them out any way you see fit, then walk to the left. More people will bust through a gate. You can kill them with the hot dog cart right in front of the gate. Exit through the newly opened door and walk all the way to the left. There will be another swarm of electroflies near the edge.
Continue on. Kick down a sign and open a door to find a dropkit. Buy ammo if you’re low! Walk under the stairs to find a small room after kicking a door open. Kill everyone inside. You can find another bottle of nom juice inside. Open the big door to exit outside, but stay in the building. Gangs of freaks and flailgunners will come at you. Kill the freaks easily, the flailgunners have strong weapons, but are weak. A few shots to their chest and they’ll explode. Use this to your advantage to take out groups at a time. If they hit you with their flailgun, you won’t be able to shoot until it blows up. Pick up one of the flailguns when they’re all dead and head to the other side of the courtyard.
Ishi will open the door to the next building. Follow him around it to find another newsbot and nom juice bottle. At the top is another dropkit. Buy access to the flailgun and upgrade it, if you like. Move on to the next area of enemies. Your character may say “leash them to conserve ammo.” Leash the enemies and they should get sucked into some fans. Move on to find another miniboss chaingunner. Take him out quickly with the explosive barrels next to him, then take out everyone else.
Once everyone is dead, you can move on. Follow Ishi down to another dropkit. You will also find another Electrofly Swarm around it. In the dropkit is a new leash upgrade! The thumper is a really good upgrade, buy it as soon as possible. With it you can throw enemies into the air for a short time. Just hold the leash button to perform.
Keep moving with Ishi to continue the story and make it to the next set of enemies. These past three sets of enemies are actually three different Echo levels. After the enemies, you will find anothernewsbot and Electrofly Swarm next to each other. Before ending the chapter, you will have more enemies and a minboss fight – chaingunner. Defeat the chaingunner and take his chaingun. Mow down the group coming out of the building in front of you. Before entering the building, look to the right for an Electrofly Swarm. Then enter to end the chapter.
Act 2 – Chapter 2
Worst family fun vacation ever
In the dropkit at the beginning of the level, you will see a new weapon is available. Find some enemies that carry them. There will be a newsbot on the way. Enter the tiny town to find the new shotgunner enemies. Use the town to get a new skillshot too. The new weapon is a quad-barreled shotgun called the Boneduster. Fight your way through the town. At the end you will find a giant mechanized thing attacking you. Dodge the “Mechaton” and keep moving.
You should find another dropkit soon after. You can now buy access to the boneduster, along with it’s ammo upgrades and skillshots. Move forward to the next group of enemies. Try out your new Boneduster skillshots too. After the first set of enemies, you will find the guy who controls the Mechaton. Kill him and steal the remote. Use it to smash everything in your way! It’s pretty fun and easy to use. When you get outside, you will face a few enemies all around you. It may take a second for the Mechaton to turn around and blast the enemies, so make sure you have cover to hide behind. The Mechaton will be gone at the end of the level. Go around the left side of the hole he falls into and meet up with Ishi. Jump down the hole to complete the Act and get the Size Matters Achievement/Trophy.
Act 3 – Chapter 1
One Sniper Means a Dozen
The chapter starts out inside a cave. Follow Ishi through it, it’s a small run through. Towards the end, you will get a timer. Run to the exit and don’t look back. Use your leash to leash stuff out of the way and run.
Keep moving on the outside. You will hear a little dialogue about the story. You should find a dropkit nearby. Buy any ammo if you need it. To the right of the dropkit, on the other side of the rock, is aswarm of Electroflies. Move on to an elevator. At the top are a new group of mutated freaks. These guys are a lot faster than the others. You cannot leash nor kick them. You can slide into them if you like, or use weapons that kill almost instantly.
After the first set of enemies is a sniper. Take him out anyway you can and steal his weapon. The weapon is called “Head Hunter.” Each shot allows you to steer the bullet towards the enemy you’re targeted on. Take out the other snipers on the building. To the right of the building, down low near the cliff, is another newsbot. Now, follow Ishi to the next area. You should see a dropkit on your way. Buy an access pass for the head hunter to unlock upgrades and skillshots for that weapon.
Continue on to find more snipers. Use your head hunter to take them all out. Try out the different skillshots if you can. When Ishi fixes the bridge, leash it to get up close and personal with more Creeps. Inside the first building will be another newsbot. Make your way through the Marina and tons of Creeps. At the end is an entrance into a building. Before going inside, look at the end of the dock for another swarm of Electroflies. Enter the building and use the elevator down.
At the bottom is another dropkit. You can now buy charge shots for the head hunter. Move forward for more dialogue. The next room has more creeps, a newsbot, and a swarm of Electroflies on the balcony. Take them all out and head up the elevator to end the chapter.
Act 3 – Chapter 2
A dam fine mess
The mission starts off in a wrecked room. A few creeps are on the second floor surrounding you, while you’re on the ground floor. Take any cover you can. Use the charge shot of the head hunter if you can. When you’ve taken out enough enemies, a wall will break down for you to exit out of. There’s also a dropkit in the middle of the room so you can refill your ammo.
Head out through the new door and go to the bridge that says “use.” To the right of the bridge, across the water, is anotherswarm of electroflies. Cross the bridge to find more creeps and a dropkit. Take out the creeps and move on into the building. You can earn a new skillshot by throwing them in the river.
The next building has molten lava, or something, nearby. You can kick the creeps into it for a new skillshot. Kill all enemies and find the chick you’re going after. A cutscene will play once everyone is dead. After the cutscene, you will get the damsel in distress achievement/trophy.
Head up a set of stairs to the next area. Your team will talk about what’s going on in this world. When you reach the room that leads outside, head to the balcony on the right for another newsbot. Next go down stairs to battle. There’s another newsbot in the middle of the boardwalk and a swarm of electroflies at the end of the boardwalk on the left.
After the fight, go downstairs to find a dropkit. Keep moving through the rail ways and through enemies. You should find anothernewsbot on those steel balcony areas. Head up the elevator to reach the top of the damn. You’ll notice giant spinning wheels. You can use the wheels for more skillshots on the enemies. Make your way through the damn, killing anyone you see. When you reach the end, the act will end.
Act 4 – Chapter 1
The Only Way Through
The chapter starts off with a little dialogue and walking. Kick and leash the appropriate areas to make it through. There will be a dropkit after you kick down a sign. I suggest grabbing the head hunter. Make your way through the first set of enemies to reach a building. Inside the building is another newsbot. Exit out the otherside to find another dropkit. The game will give you an aim event, showing you the man eating plants. To the left is a swarm of electro flies, hiding amongst some bushes. Kill the plant and leash the wrecked bus to continue on.
The other side holds lots of enemies. Use your head hunter to take them out long range. You can also try to use those nom parasites for more skillshots. They’re the yellow balls that grow around the level. After the enemies, head down to a roadblock. You will have 15 seconds to figure out a way through. Leash the giant ball at the top of the road before the clock winds down to earn the “Destroyer of Worlds” Achievement/trophy.
Walk through the gates to hear more dialogue. A dropkit is to the left. Inside the tent behind the dropkit is another newsbot. Enter the small building to the right, opposite end of the tent. Jump through the window to progress. More enemies will come at you. Kill them anyway you see fit. These enemies won’t be the fast ones or snipers, so you won’t NEED the head hunter. At the end of the gang is another boss, this time it’s a cannoneer. Defeat him by blowing up his backpack, the finish him off like the last bosses. Pick up his weapon, a new explosive weapon called the bouncer. The bouncer fires explosive balls. You can hold the fire button to let the balls bounce a few feet, then release the fire button to blow them up. Enter the door to finish the chapter.
Act 4 – Chapter 2
Maneaters prefer tight spots
The chapter starts off with a little dialogue about some green balls. Stay away from them! Find the dropkit further on and buy an access pass to the bouncer, if you want. Move forward to find the first set of enemies. Shoot the green pod to make them fight with each other. Kill off the survive and move on.
Another scene will play at the top. Move on after the scene to find a few more enemies. Don’t head down stairs until you take out theswarm of electroflies to your right first. Head downstairs and take out all enemies in your way. You can use those green pods for your benefit if you like. Another swarm of electroflies is at the bottom to the left. To the right is the path to the next area.
Move forward to see a man eating plant eat an enemy, keep an eye out for your safety and for more skillshots. You can also feed an explosive barrel and nom parasite to the plants for more skillshots. The nom parasite will give you an achievement/trophy. Kill all the enemies and find a newsbot to the left of them all.
Walk through a forest of cacti to reach a dead end. This area has a few more enemies and a newsbot. Kill the bot and wait for the helicopter to blow open a hole for you. The other side has a ton more enemies, including another miniboss. Defeat everyone and find Ishi.
Another dropkit will be around the corner. After that is another huge staircase full of enemies. The first set should have a newsbot, the second set should have a swarm of electroflies. Reach the top to find the nom parasites and two man eaters. Kick one ball into one of the man eaters for the achievement/trophy. Move to the next area and look to your right. There should be another swarm of electroflies in a small corner. Head left, opposite the electroflies, to proceed through the jungle.
This last part is a boss battle. You will fight a giant plant. The fight is simple enough, shoot him until his health meter is down, then blow off the red glowing parts. You must blow off the red glowing parts twice to get the final red glowing part. The plant will try to eat you while you’re killing it, so be ready to tap the kick button multiple times while it’s trying to get you. Finish it off for the weed killer achievement/trophy/skillshot.
Act 4 – Chapter 3
Itchin’ To Crumble
The chapter starts out with a little story dialogue. Continue on to the first dropkit and more back story. Close by the dropkit is another swarm of electroflies. You can now buy charge shots for the bouncer. Walk through the building. Your team will tell you to slide down to reach the bottom, but first look to the left to find anewsbot in a door. The bottom area is the start of an echo mission, and the mission featured in the demo. Walk through killing anyone you can on all environmental pieces. You can even use the elevator to kill someone.
After the first set of enemies, you will fall through a door. Look behind you for a newsbot. Ahead is another dropkit. Make your way through a few more groups of enemies. This whole area is pretty simple. At the end of the mission you will get a counter. Escape the building and kill anyone on the way for the achievement/trophy “no one left behind.”
Act 5 – Chapter 1
Crash resistant.
Start walking to the elevator to find a newsbot. At the top of the elevator is another dropkit, switch to whatever you like, there will be lots of enemies up here. This chapter is pretty straightforward, get to the cable car and defend your position. Take out waves of mutated enemies while your team gets the door open. When you reach the cable car, you should see a little dead end area near you. Go to the dead end and look on the other side for a newsbot andswarm of electroflies.
Before you enter the cable car, I suggest you switch to explosive weapons like the flailgun and bouncer. While inside the cable car, you will have a chance to press the aim button a few times for some points.
Act 5 – Chapter 2
How do we solve that?
This chapter has tons of fully mutated enemies, called “burnouts.” Fire at the yellowish red growth on them to take them down quickly. I suggest using explosive weapons like the flailgun and bouncer. Destroy all burnouts in the starting area to open up the next lobby. There’s a small room to the right behind the counter the holds aswarm of electroflies. Stock up in the dropkit, then open the door up to the next room. The dropkit allows you to upgrade your flailgun for a charge shot.
Inside the next room will be tons of burnouts. Once on the other side, you will need to open the door for your teammates. Survive the onslaught of burnouts, then move to the next area. There will be a dropkit to the right. Use a charged flailgun shot to clear out the hall if you like. Many charged shots would work actually.
Head to the crashed helicopter and take out any burnouts you see. You can kick some burnouts into the helicopters for a skillshot. A super burnout will come out of nowhere. Injure him enough to stagger him, then kick him into the helicopter for an achievement/trophy/skillshot. Move on to the last dropkit and end the chapter in the elevator.
Act 5 – Chapter 3
I see we’re all a bit upset
Reach the first dropkit and take any weapons you want. Fight a few creeps down a small straircase until you reach a cutscene. Make your way through the dark tunnels. Get ready to aim and fire when the time comes. If you do it just right, you will earn the steady aim skillshot. Make it to the room full of green liquid. Leash a pipe up top to make it out. Up top will be another newsbot.
Move on to the next set of enemies. They will be around a bunch of cacti and electric ads. Use them to your advantage. A dropkit will be in the middle of one of your fights. Inside is the charge shot upgrade for the boneduster! Fight your way through more enemies, including a cannoneer miniboss. After the miniboss, you will enter a building and find another newsbot.
Fight your way through the city and a ton of burnouts. The monster from earlier will return and give chase. Make it to the end of the city and up an elevator. Trishka will pilot while you gun. Destroy everything in your way, especially the marked objects. When the dinosaur is down, a cutscene will play, ending the act. If you can blow up all red explosive barrels on the rooftop, you will earn another achievement/trophy.
Act 6 – Chapter 1
Daddy’ll get you out
You start this chapter inside a building. Your objective is to make your way to the bottom. You will find a newsbot before the first dropkit, and a dropkit before any enemies. Switch to some CQB type weapons. You will encounter a lot of shotgunners and enemies using screamers. Use the electrical fields to your advantage. A new miniboss will appear too, a driller. Try to defeat the driller like you would a chaingunner. When you defeat him, pick up his weapon. You can buy an access pass at the next dropkit.
Fight your way downstairs yet again. The characters will talk about the radiation storms and how the workers went on strike. You should see another newsbot in the area. Keep moving to find another dropkit and a room full of enemies. Clear the room and call the elevator. The elevator will bring up two minibosses – a cannoneer and a driller. Take them out and head down. The lift at the bottom will end the chapter.
Act 6 – Chapter 2
Bad trouble a knockin’
Walk through the first part of the level listening to some dialogue and back story. Your team will fall into a river of radioactive sludge. All you can do is run forward and try to follow your team out of it. At the end will be tons of burnouts. Fight your way through the burnouts to open a door. Once the door is open, look to your left up a rail. A newsbot should be rolling around by itself up there. Keep going until a cutscene plays. In the background, you should see aswarm of electroflies. When you reach the other end of the platform, turn around and shoot them.
Head down to take care of some burnouts. A dropkit will be nearby, switch to a head hunter. Your next objective will be to take out some snipers. It may be a bit tough so use the charged shots for explosions. Keep going down under the city. Another real time event will play out showing new enemies. Keep going and find the next dropkit. It contains the last upgrade for your weapons.
Activate the giant lift to the next level. Tons of the small radioactive scorpion looking things will run up the lift to some gears. Shoot them before they destroy the gears. Once at the top, you need to run out of the room before the timer ends. Leave the tunnels and slide down a cable to end the chapter.
Act 6 – Chapter 3
Ponderin’ them bodies
Fight your way through a few burnouts to get to the Ulysses. There will be a few more burnouts on board. When you reach a certain room, Ishi will tell you not to fire your weapon. Use your leash and kick the burnouts into the fans or any other things you see.
The next room contains a few force fields. Leash the big structure in the middle of the room to jump over the barriers quickly. The force fields will come back up after a few seconds. You can kick a burnout into the force fields for a new skillshot. Jump over a window into a room to get to the next area. The General will open a door. Inside is a giant burnout. Shoot him back to some exposed wires. When he’s in the wires, leash the object above him. You should unlock the grilled meat achievement/trophy/skillshot for doing so.
Reach the bomb room and deactivate the bomb. Escape out of the room through the left vent. Make your way around the tunnels and the last door to end the act.
Act 7 – Chapter 1
That thing is leaving without us
Make your way through the destroyed building to the elevator. A dropkit will be at the entrance. Go down the elevator to find the two different mutant gangs fighting each other. After the first group, you should find a newsbot in the middle of a room. After the bot is aswarm of electroflies in a tree. Fight through another group of mutant freaks to reach the spaceport. Of course, the spaceport has more mutants, including miniboses.
You will stay up top while your team stays down below in the spaceport. You can help them out to gain more points. Kill the first two down below to open the gate next to you. More enemies will be inside. Take them out and move to the next area. The next area has two shops to the left. Inside one of them is another newsbot. Fight through the spaceport to reach the cargo hold. The cargo hold is like a little breather, free from mutants. At the end is aswarm of electroflies and a dropkit. Get your best quick fire weapons, I recommend the penetrator. You have 2 minutes to reach the ship. If you can kill everyone on the way to the ship, you will earn another achievement/trophy. Leash the ship to end the chapter.
Act 7 – Chapter 2
I don’t hold you accountable
The chapter starts with you and your team in the ship. The achievement/trophy “stowaway” should unlock instantly. Grab whatever weapons you want from the dropkit, you will be facing extremely tough enemies. The first door that opens will have these enemies. They can take multiple shots and fire their own charged PMCs. There’s not much to say about this. Fight your way to Serrano, then face him in an interactive scene.
After the scene, you will be back on land. Make your way to the Ulysses through crowds of Heavy Echo soldiers. Your character should say something like “PS, this is a dildo idea.” Look through a door to your right when you hear this for the final newsbot. When you get close, a timer will start counting down. Kill everyone and run to the escape pod to make it off the world and end the game.
Campaign Weapons
There are 8 weapons in Bulletstorm’s campaign, 9 if you count the Leash. Each weapon can be upgraded via drop kits found throughout the levels. You may need to buy an access pass to upgrade the weapon first. You buy upgrades with the skillpoints you earn through skillshots. The Peacemaker Carbine (PMC) is the default weapon you start out with.
The prices of the upgrades depend on the difficulty of the campaign. The higher the difficulty, the higher the price. I will give the prices for the Normal setting since it’s right in the middle.
Leash
Use the leash to launch enemies into the air and towards you. While in the air they will be in suspended animation for about 4 seconds. Use that time to think up and accomplish skillshots. Once upgraded, the leash can be used to slam enemies into the ground and fly in the sky for a longer time than the regular leash or kick. You must buy the “Thumper” ability to do this. You will have three shots with the thumper from the start.
Thumper
3800 Sp (Act 2 Chapter 1)
- Upgrade by 3 (6 Total) – 1000 Sp
- Upgrade by 3 (9 Total) – 1300 Sp
Peacemaker Carbine
The Peacemaker Carbine is a fully automatic assault rifle. It has high accuracy and rate of fire. The charged shot of the PMC fires 100 bullets in one blast.
Default Stats:
- 50 Rounds Per Clip
- 350 Rounds Extra (400 Rounds Max)
- 3 Charge Shots
Upgrades:
- Ammo Clip – 160 Sp
- Charge Shot – 180 Sp
- Upgrade Ammo to 500 Rounds Max – 800 Sp
- Upgrade Ammo to 600 Rounds Max – 1000 Sp
- Unlock Charge Shots (Act 1 Chapter 2) – 3200 Sp
- Upgrade Charge Shots to 6 Total – 1200 Sp
- Upgrade Charge Shots to 9 Total – 1600 Sp
Screamer
The Screamer is a high-caliber revolver. It has decent accuracy. You can find it in Act 1 Chapter 3. The charged shot for the screamer is an explosive flare. You fire the flare at the enemy and it explodes about a second after it touches the floor or enemy.
Default Stats:
- 8 Rounds Per Clip
- 24 Rounds Extra (32 Total)
- 3 Charge shots
Upgrades:
- Access to Upgrade – 600 Sp
- Ammo Clip – 200 Sp
- Charge Shot – 200 Sp
- Upgraded Ammo to 48 Rounds Max – 800 Sp
- Upgraded Ammo to 64 Rounds Max – 1000 Sp
- Unlock Charge Shots (Act 2 Chapter 1) – 2400 Sp
- Upgrade Charge Shots to 6 Total – 1200 Sp
- Upgrade Charge Shots to 9 Total – 1600 Sp
Flailgun
The Flailgun is a special explosive weapon. It fires two grenades linked by a chain. After firing the chained grenades you must press the fire button again to detonate them. Found in Act 2 Chapter 1. The charged shot of the flailgun heats the chain, allowing the weapon to slice through enemies like a hot knife through butter.
Default Stats:
- 2 Rounds Per Clip
- 8 Rounds Extra (10 Total)
- 3 Charge shots
Upgrades:
- Access to Upgrade – 800 Sp
- Ammo Clip – 240 Sp
- Charge Shot – 250 Sp
- Upgraded Ammo to 14 Rounds Max – 800 Sp
- Upgraded Ammo to 18 Rounds Max – 1000 Sp
- Unlock Charge Shots (Act 5 Chapter 2) – 2200 Sp
- Upgrade Charge Shots to 6 Total – 1200 Sp
- Upgrade Charge Shots to 9 Total – 1600 Sp
Boneduster
The Boneduster is a quad-barreled shotgun. Deadly at close range, weak at long range. Found in Act 2 Chapter 2. The charge shot fires super-heated air at the enemies, killing them instantly up close and at distance.
Default Stats:
- 4 Rounds Per Clip
- 16 Rounds Extra (20 Total)
- 3 Charge Shots
Upgrades:
- Access to Upgrade – 900 Sp
- Ammo Clip – 360 Sp
- Charge Shot – 1000 Sp
- Upgraded Ammo to 28 Rounds Max – 800 Sp
- Upgraded Ammo to 36 Rounds Max – 1000 Sp
- Unlock Charge Shots (Act 5 Chapter 3) – 3600 Sp
- Upgrade Charge Shots to 6 Total – 1200 Sp
- Upgrade Charge Shots to 9 Total – 1600 Sp
Bouncer
The Bouncer is a bazooka that fires impact-resistant explosive rounds. You can fire the weapon to have the round explode on impact, or you can fire the weapon and hold the trigger to keep the round from exploding until you release the trigger. Found on Act 4 Chapter 1.
The charge shot is a constantly exploding, bouncing ball. You can leash or kick it around while it explodes.
Default Stats:
- 3 Rounds Per Clip
- 9 Rounds Extra (12 Total)
- 3 Charge shots
Upgrades:
- Access to Upgrade – 1000 Sp
- Ammo Clip – 340 Sp
- Charge Shot – 500 Sp
- Upgraded Ammo to 15 Rounds Max – 800 Sp
- Upgraded Ammo to 18 Rounds Max – 1000 Sp
- Unlock Charge Shots (Act 4 Chapter 3) – 2600 Sp
- Upgrade Charge Shots to 6 Total – 1200 Sp
- Upgrade Charge Shots to 9 Total – 1600 Sp
Penetrator
The Penetrator is a special projectile weapon. It fires drills at high speed to penetrate any enemy in it’s path. The drills can fire through multiple targets. The charge shot fires a rocket-propelled drill which keeps the enemy in mid air. You can then shoot, leash, or kick them in any other direction.
Default Stats:
- 1 Rounds Per Clip
- 13 Rounds Extra (14 Rounds Max)
- 3 Charge Shots
Upgrades:
- Access to Upgrade – 1400 Sp
- Ammo Clip – 120 Sp
- Charge Shot – 200 Sp
- Upgrade Ammo to 18 Rounds Max – 800 Sp
- Upgrade Ammo to 22 Rounds Max – 1000 Sp
- Unlock Charge Shots (Act 6 Chapter 2) – 3000 Sp
- Upgrade Charge Shots to 6 Total – 1200 Sp
- Upgrade Charge Shots to 9 Total – 1600 Sp
Head Hunter
The Head Hunter is a semi-automatic sniper rifle. Each shot allows you to steer the bullet towards the enemy. Found in Act 3 Chapter 1. The charged shot allows you to steer an explosive round, which can explode whenever you like.
Default Stats:
- 5 Rounds Per Clip
- 5 Rounds Extra (10 Total)
- 3 Charge Shots
Upgrades:
- Access to Upgrade – 1200 Sp
- Ammo Clip – 500 Sp
- Charge Shot – 220 Sp
- Upgraded Ammo to 15 Rounds Max – 800 Sp
- Upgraded Ammo to 20 Rounds Max – 1000 Sp
- Unlock Charge Shots (Act 3 Chapter 1) – 2800 Sp
- Upgrade Charge Shot to 6 Total – 1200 Sp
- Upgrade Charge Shot to 9 Total – 1600 Sp
Chaingun
The Chaingun is a high rate of fire and high power minigun. You can find it in select locations. The chaingun has a power gauge, shown by four lightning bolts. When the power is out, you cannot fire anymore.